Creamy Carrot Soup with Coconut and Thyme

I know mid-August is not the typical time to post a soup recipe, but I am craving vegetables and simplicity, and this soup is that.

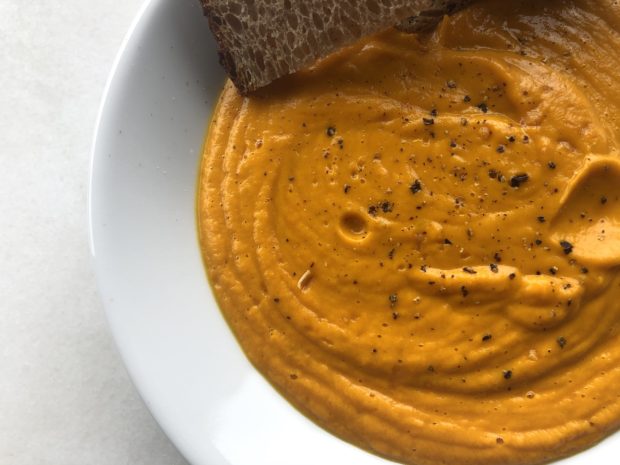
There’s something extremely comforting about carrot soup – and despite the heat, I find I am still in need of comfort these days.  My mom used to make a carrot soup like this when I was young that I always loved – first she used cream, and then silken tofu.  Neither of those appealed to me this week, so I used coconut milk and it was perfect.

The texture is velvet.  The taste is intensely carrot – that sweet and savory double-agent identity.  The carrot and thyme just punctuate it lightly to say, this soup is interesting.  I love to dunk good brown bread in as I spoon it, fully of coarsely ground black pepper.

The great thing about this version of the soup is I streamlined it down to a five-minute hands-on activity.  Throw the shallots into a pot, follow one minute later with carrots and broth.  And walk away.  Forty-five minutes later, toss the soft carrots and soup into a blender with the thyme and coconut milk.  Whiz up and eat straight from the blender with a spoon, standing up in the kitchen – which is what I did.

Creamy Carrot Soup with Coconut and Thyme

serves 4 to 6

INGREDIENTS

  • 1 tablespoon of grapeseed oil, or other neutral oil
  • 1 large shallot, chopped
  • 2 pounds of organic carrots (so you don’t have to peel them), topped and tailed, and cut into chunks
  • 1 quart of low-sodium vegetable broth
  • The leaves from 2 stems of fresh thyme
  • 1 14.5-ounce can of coconut milk

METHOD

Heat the oil in a large stock pot over medium heat.  Add the shallots and cook until just translucent – 1 to 2 minutes.  Add the carrots and the broth, season lightly with salt and pepper, cover, reduce the heat to low, and simmer for 45 minutes, until the carrots are very tender.

Pour the soup into the blender with the thyme and coconut milk.  Put the lid on the blender, and take out the center little cover (the soup is very hot and the steam could cause issues if you don’t do this).  Place a folded paper towel over the opening, and then a dish towel over that (trust me!).  Then, whiz on the highest speed until velvety smooth.  Taste for seasoning and add salt and pepper as needed.

print this post Posted by Kerry | Tagged , , , , , , | 2 Comments
Categories: 60 Minutes, Cheap, Easy, Eat, Recipes, Soup, Soup & Salad, Vegetarian
 

“Upstate” Farm Stand Summer Ravioli with Fresh Tomato, Corn, and Basil

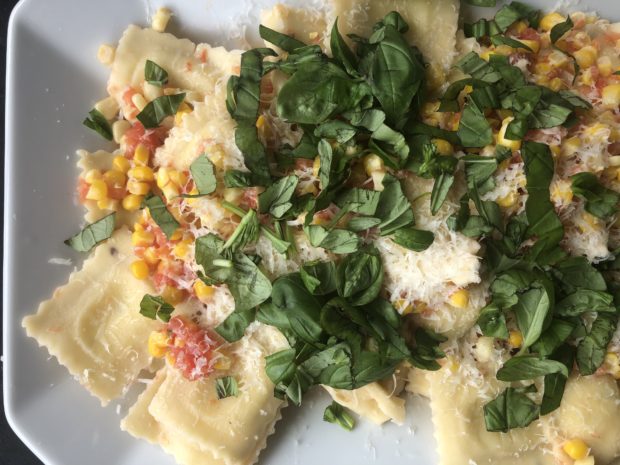
One of the most strident sensory memories from my childhood is of spending scalding summers in Woodstock, NY, sitting on the back porch and eating pasta.  My mom and I would drive back to the city every week or two to go to Fairways on the Upper West Side (incorrigible city folks; because there was no grocery store upstate?).  I would wander the aisles, smelling the rinds of the cheeses through their wrappers, the brine of the olives in their open buckets, the scented coffees, and I seem to remember semolina on the floor, but that could be a little garnish added by memory.  Did we nip down to Soho to stop at Raffetto’s for the ravioli and tortellini and pasta, or did we just pick them up at Fairways?  The decades have blurred the truth.

But what my mom did with those city pastas was all upstate.  Devoted to organic produce since before it was cool, she would take the bounty of basil and pulverize it to a pesto that radiates in my memory as chlorophyll neon.  On the cheese ravioli, the pesto was so mesmerizing, that any whiff of fresh basil to this day time-machines me back to that back porch at dusk, with the sounds of the creek rushing further down the mountain, the breeze in the sky-scraper leaves, and the bears lazing through the summer brush.  We would go to a farm stand, and buy tomatoes, and buy corn and pull back the husks and silk and gnaw it raw, and drink warm fresh watermelon juice full of seeds (it was the 80s).  It is my first and most unassailable memory of summer.

Now, I abhor summer.  I can’t make sense of its heat, or the fact that the sun says it’s time to rest but the pace of life says it’s time to work, or the oven that is New York City.  I always eagerly anticipate September.  But the one summer love I do maintain, since that summer in 1988, is the produce.  Every day is a festival of tomatoes and melon and summer squashes and cucumbers and green beans and corn.  With the juice running down my chin and arms, it has all the abundance and irreverence of Eden.

I’m spending this summer in the city.  Which means easy access to Raffetto’s ravioli.  (Not an ad, just a lifelong love affair!)  But I couldn’t resist a farm stand sauce, with fresh tomato flesh grated into an almost-raw sauce studded with barely cooked crisp fresh corn and the requisite freshly torn basil.  Almost as good as Maman’s pesto.  I hope you try it and it tastes of summer.

“Upstate” Farm Stand Summer Ravioli with Fresh Tomato, Corn, and Basil

serves 3-4

INGREDIENTS

  • 22 ounces of cheese ravioli (this is the Raffetto’s box of 48 medium ravioli; you can ballpark this)
  • 1 ear of corn, kernels removed from the cob
  • 2 beefsteak tomatoes
  • A small handful of basil leaves
  • Pecorino Romano, for garnish

METHOD

Cook the ravioli according to package instructions.  2 minutes before you drain them, add the corn kernels.  Drain and set aside.

While the ravioli is cooking, cut the tomatoes in half across the equator.  Using the coarse side of a box grater placed over a bowl, grate the flesh of the tomato.  Magically, the flesh will grate and leave you just the skin, which you can toss.  Season the tomato flesh with salt.

Once you have drained the ravioli and corn, add the tomato flesh to the same, now empty, pot (no need to wash it).  Cook over medium heat for just 1-2 minutes.  Add in the ravioli and corn, and cook another minute to bring everything together.  Pour gently onto a serving platter and top with Pecorino grated on top and the basil freshly torn on top of that.

print this post Posted by Kerry | Tagged , , , , , | Comments Off on “Upstate” Farm Stand Summer Ravioli with Fresh Tomato, Corn, and Basil
Categories: 15 Minutes, Cheap, Easy, Eat, Main Courses, Recipes, Sides, Starches, Vegetarian, Vegetarian
 

Whole-Lemon Zinger Sauce with Thyme and Roasted Trout

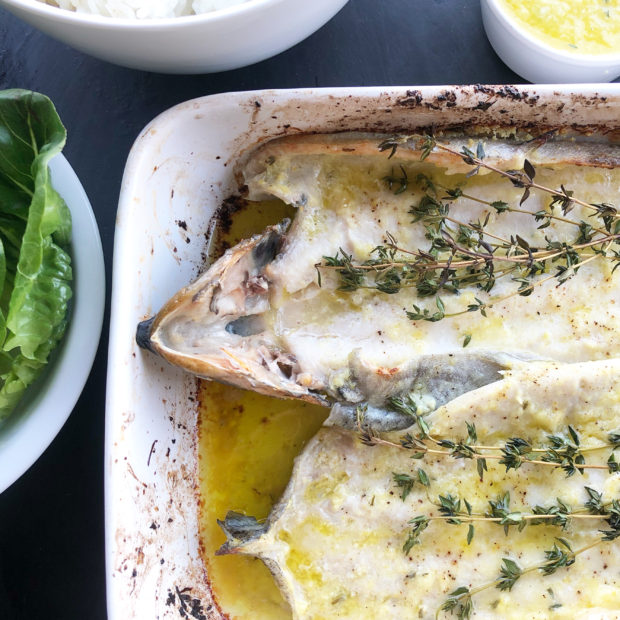
Sometimes, you need a ray of sunshine to break through the clouds.  Not everyone gets that from a recipe, but I do, and I imagine that other like me exist.  Lemons are sunshine to me – the sunny, happy color; the bright, exuberant flavor; the unapologetic enthusiasm of its sweet-tart starburst juice.  I love lemons.

I tried a technique here that I have wanted to try for a long time – using the whole lemon.  The juice, the pulp, the zest, the pith – the whole shebang.  My Moroccan grandmother Meme always uses the whole lemon, but those are preserved – also wonderful, but their own salty, sour thing.  I was excited to try it with a fresh zinger of a lemon this time.

I found a great technique online where you use the whole lemon, but slice off the ends to expose the flesh.  That way, you are removing some of that bitter pith, and the amount of bitterness left on the lemon is just right.  I’ve done this a number of times, and it works every time.  Just blitz the remaining lemon (make sure you wash it; organic preferred!) with olive oil, salt, pepper, and a few leaves of thyme.  It is glorious.  I spoon it over sliced avocado.  I dip little gem lettuce leaves in it.  I mix it into fluffy warm rice.  I’m going to try it on steak and on roasted potatoes.  Ceiling unlimited.

For this recipe, I roast whole butterflied trout in the lemon sauce.  The whole recipe is four ingredients, a quick blitz in the blender, and then 15 minutes in the oven.  And then you have this healthy, punchy, elegant dinner.  It’s ridiculous bang for the buck.  I hope this recipe brings you sunshine this summer.

Whole-Lemon Zinger Sauce with Thyme and Roasted Trout

serves 2

INGREDIENTS

1 organic lemon (or an unwaxed one washed very well)

½ cup olive oil

1 teaspoon fresh thyme leaves, and a small bunch of fresh thyme on the stem

2 butterflied trout, about 1½ pounds total

METHOD

Preheat the oven to 475 degrees F.

To make the sauce, get out your blender.  Cut the two ends off the lemon all the way down to expose the flesh and discard the ends.  Then, cut the lemon into eight pieces and drop them in the blender with the olive oil, salt, and pepper.  Whiz on high until the sauce is very smooth.  Add 1 teaspoon of thyme leaves and whiz just to combine.

Find an oven-safe baking dish that nicely nestles your two fish just so.  Drizzle it with a little bit of olive oil.  Then spoon in one quarter of the lemon sauce all over the bottom of the dish.

Season the trout inside and out with salt and pepper.  Place them in the baking dish skin-side-down, and move them around so the skin side gets coated with the lemon sauce.  Then, spoon another quarter of the lemon sauce over the flesh, and smush it around to coat.  Scatter the whole thyme stems over the top of the fish – I like to toss them lightly with a smidge of olive oil so that they crisp and don’t burn.  I leave the fish to marinate while the oven gets hot.

That’s it!  Tuck them into their warm oven bed for 15 minutes, and when they are opaque and flaky, they are done.  I serve the remaining lemon sauce alongside (it’s also great on avocado in the morning!).

print this post Posted by Kerry | Tagged , , , , , | 2 Comments
Categories: 30 Minutes, Easy, Eat, Fish, Main Courses, Recipes
 

Sticky-Icky Ribs with Rhubarb, Rosemary, and Roasted Garlic

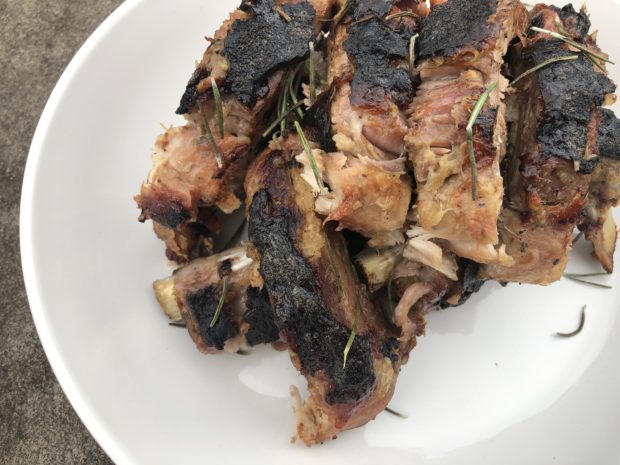
For a long time, I thought if I wanted to eat ribs, I needed to go to a barbecue place – or Houston’s, where they are delicious.  If I wanted to make them at home, I would need a barbecue, or a smoker, or forty-five ingredients to make a sauce.  Turns out, not so.

All it take is five ingredients, including the ribs, and an oven.

A few years ago, I was reading Elizabeth Bard’s first book Lunch in Paris, and ever since then I have been riffing on what I came to call Bistro Ribs.  These ribs are cooked in the oven until fork tender.  No muss, no fuss.  NYC kitchen simple.

I came to rhubarb later in life, thanks to Mr. English.  I very often make him a simple compote of rhubarb and honey which he spoons over Greek yogurt, but I am always intrigued by the savory applications I come across.  The sweet tang of rhubarb and honey reminds me very much of sticky, finger-licking barbecue sauce, and so I tried it here on ribs, perfumed with rosemary and punched up with roasted garlic.  It is so good.

To start, buy the best baby back ribs you can.  I like baby back for the leanness of the meat.  Salt and pepper these, and lay some fresh rosemary stems underneath.  Before tucking the ribs under foil for two hours in a low oven, place a whole small head of garlic on the baking sheet along with the meat.  The rosemary will steam subtle woodsiness into the meat, and the garlic will roast low and slow into that sweet garlic suede that will melt into the rhubarb sauce.

Meanwhile, the rhubarb is blipping smilingly on the stove with some water and honey and rosemary and salt, until it forms a grinning pink paste that gets shellacked onto the ribs for their last few minutes in a blasting hot oven.  The ribs come out fork-tender, charred in places, sticky, tangy, herby, and lovely.

I like these ribs for a safer at home July Fourth.  You don’t need to go to a restaurant.  You don’t need a barbecue (not code for many of us New Yorkers!).  And not typical.  Easy, but unexpected.  I hope you love them!

Sticky-Icky Ribs with Rhubarb, Rosemary, and Roasted Garlic

serves 2 – 4

INGREDIENTS

2 pounds baby back ribs

4 stalks fresh rosemary, plus 1 tablespoon chopped fresh rosemary leaves

1 small head of garlic

3 stalks of fresh rhubarb (between ¾ pound and 1 pound), chopped

1/3 cup honey

METHOD

Preheat the oven to 425 degrees F.

Prepare a rimmed baking sheet by lining it with foil (easy cleanup), and then a piece of parchment (easy rib removal).  Season the ribs on both sides with salt and pepper, and place them on the prepared baking sheet, meat side up.  Tuck the whole stalks of fresh rosemary underneath the ribs, like little mattresses.  Cut the top quarter horizontally off the whole head of garlic and place it on the baking tray.  Using two sheets of foil, cover and seal the whole baking sheet: ribs, rosemary, garlic, and all.  Roast for 2 hours, undisturbed.

Meanwhile, make the rhubarb honey glaze.  Add the rhubarb, 1 tablespoon of chopped fresh rosemary, and ½ cup water to a medium sauce pot.  Simmer over medium to medium-low heat for 15 minutes, until the rhubarb begins to break down.  Add the honey and season with salt and pepper.  Simmer an additional 15 minutes, until thick and soft.  Set aside.

Once the ribs have had their two hours in the oven, take them out.  Turn the oven up to 500 degrees F.  Peel the foil carefully off the ribs (steam!) and discard.  Squeeze the roasted garlic into the rhubarb sauce and stir to combine.  Then shellac the sauce evenly over the tops of the ribs.  Place back in the oven for 15 – 30 minutes, until the sauce is deeply caramelized and blackened in some spots.  Slice the racks into individual ribs, pile into a tempting stack, and tear some fresh rosemary over the top.  Sprinkle with sea salt and try to resist.

print this post Posted by Kerry | Tagged , , , , , | Comments Off on Sticky-Icky Ribs with Rhubarb, Rosemary, and Roasted Garlic
Categories: Cheap, Easy, Eat, Main Courses, Meat, Recipes
 

Pantry-Dump, One-Pot Glorious Green Thai Curry in a Hurry

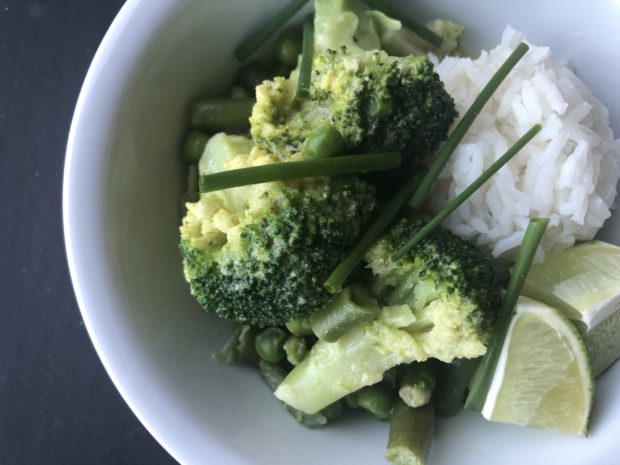
When we were in full lockdown, doing full-time work and full-time childcare, and life was – full to say the least – I came up with this recipe for a quick and healthy lunch using what I had stocked from my emergency pantry shopping: frozen vegetables, canned coconut milk, and jarred Thai curry paste.

Oh, wait!  Nothing has changed!  I am still doing full-time work and full-time childcare!

And I am still making this at least twice a week, even though the fears of living exclusively on dried beans have since dissipated.  Frozen vegetables, however, have been fully rehabbed in my heart, and I am carrying on a near-daily affair with them.  Don’t judge.  These are extraordinary times.

Eat well and stay well!

Pantry-Dump, One-Pot Glorious Green Thai Curry in a Hurry

Serves 2-3

INGREDIENTS

1 can full-fat coconut milk, shaken

2 tablespoons Thai green curry paste (you could also use Thai red curry paste)

30 ounces of frozen vegetables (I use broccoli, green beans, and peas – bonus if you have the peas with carrots in the bag)

1 lime

Torn fresh cilantro, chives, or Thai basil (optional)

METHOD

Dump the coconut milk in a wide pan.  Bring to a simmer.  Whisk in the curry paste.  Season with salt.  Add the vegetables directly from the freezer.  Simmer for 15 minutes, stirring occasionally, until the vegetables are green and hot and the sauce thickens slightly.  You want to stop before the vegetables go brown/yellow.  Keep them fresh!

Squeeze in the juice of half of the lime, and cut the remaining half into wedges for serving.  Tear the herbs over the top and serve with rice or cooked rice noodles.  Yum.

print this post Posted by Kerry | Tagged , , , , , | Comments Off on Pantry-Dump, One-Pot Glorious Green Thai Curry in a Hurry
Categories: 15 Minutes, Cheap, Easy, Eat, Main Courses, Recipes, Sides, Vegetables, Vegetarian, Vegetarian
 

COVID Cooking: Ten-Minute Chickpea Pasta with The Easiest Cherry Tomato, Mint, and Chili Sauce

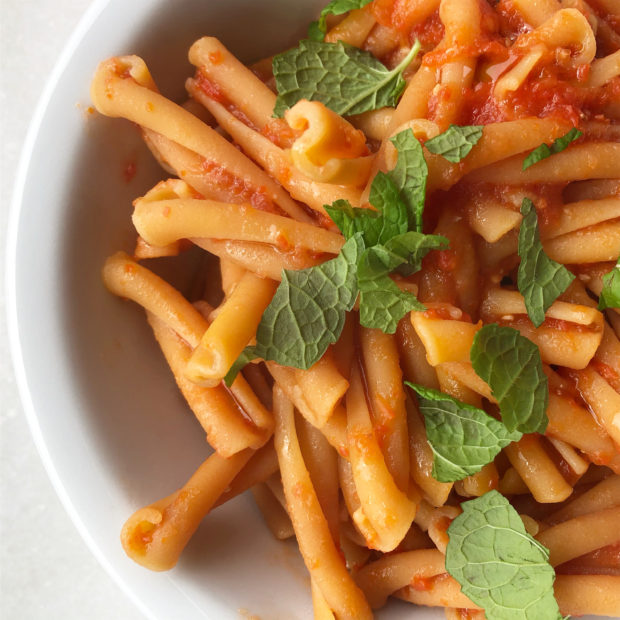
Lately, I have been getting into a rhythm.  Maybe because everything is the same.  My apartment.  My patterns.  My schedule.  Sheltering in place, I have discovered, doesn’t lead to a lot of serendipity, spontaneity, or rushing distractions.

And I have come to quietly enjoy the predictable pattern of life now.  I don’t know about you, but I am not among those with “extra time”.  I hear this discussed as a commonality; it just doesn’t apply to me.  I know there are those of you our there who are, like me, full-time parenting and full-time working.  Or are stressed for myriad other reasons (how can you not be?).  Or are spending your time in other packed ways (demonstrating, nursing, cleaning, planning), and cooking isn’t one of them.  So, you may be in the mood for something quick.

I have been making this, like, two to four times a week.  I am that committed to it.  Pasta is a great quarantine staple – long-lasting, filling, comforting, quick to make – but I had had enough.  So, I switched to chickpea pasta, which I love, not only because it’s legume-based, but because it has that lovely, nutty flavor that feels so Sicilian to me in its own lovely way.  I cook a box of that (I like the Barilla brand because the only ingredient is chickpeas, but use what you like; you could also certainly use regular pasta here), and while it’s boiling away, I make the easiest and best sauce by whirling up a pint of fresh cherry tomatoes with a stick blender and adding it to a pot with olive oil, a sprig of fresh mint (you could use basil), and a pinch of dried chili flakes.

The result is this under-10 minute, guilt-free lunch that whisks me away (mentally) to my honeymoon while I am eating it at my desk in my bedroom on a Zoom call.

Wishing you love and health and good food from NYC….

Chickpea Pasta with Fresh Tomatoes, Mint, and Chili

serves 2

INGREDIENTS

1 8- to 9- ounce box of chickpea pasta

1 tablespoon olive oil

1 pint of cherry or grape tomatoes

1 sprig of fresh mint

1 pinch of dried red chili flakes (optional)

METHOD

Cook the pasta according to package directions.

Meanwhile, place the tomatoes in the jug that comes with your hand blender (a measuring cup also works well), and using the hand blender on top speed, eviscerate the tomatoes into a puree.  You can also do this in the food processor, but using a hand blender is so much easier to clean up.

In a small skillet, heat the olive oil on medium heat.  Add the tomatoes, mint, and chili if using.  Season with salt.  Simmer for 5 minutes, until the color of the sauce slightly darkens and gets less milky.

Drain the pasta and add to the sauce.  Simmer for 1 minute more, so that pasta can absorb some of the sauce.  Serve!

print this post Posted by Kerry | Tagged , , , , | 2 Comments
Categories: 15 Minutes, Cheap, Easy, Eat, Main Courses, Recipes, Sides, Starches, Vegetarian, Vegetarian
 

COVID Cooking: Addictive Lazy Guacamole

Note: During this time, I am trying to post more regularly in the hopes that in my small way, I can help people cope with a crisis.  As I usually do – through food.  I am trying to fulfill the requests for pantry-focused meals that are wholesome to the mind and the body.  You can find all the recipes here.  Wishing everyone all the very best from NYC!

Let me just disclaim that there is NOTHING authentic about this guacamole, but it’s ADDICTIVE.

When I was a little kid growing up in NYC, maman and I would go to the Park Slope Food Co-op and buy organic corn chips and avocados and Newman’s Own salsas.  She would mash the avocado and stir in salsa, and we would eat an absolutely inconceivable amount.

As I wrote recently, now that we are home, we have re-instituted apero at 5 or 6 o’clock.  This is what I make almost every night.  I mash the avocado, season it well with salt, and stir in some fresh pico di gallo I get from Fresh Direct.  It’s a big step up from jarred salsa if you can get it, but both are delicious.  On devilish days, I eat it with corn chips.  And on virtuous ones, with baby carrots.  Either way, I can’t stop.

Addictive Lazy Guacamole

serves 2

INGREDIENTS

1 ripe Hass avocado

¼ cup salsa, preferably fresh (like pico di gallo, but you can also use fun varieties, like green tomatillo or mango or corn)

METHOD

Scoop out the flesh of the avocado, season with salt, and mash it up completely.  Lightly drain the fresh salsa (don’t bother with this step if using jarred) and mix completely into the avocado.

Serve with corn chips or, if feeling virtuous, baby carrots.

print this post Posted by Kerry | Tagged , , , , , | 4 Comments
Categories: 15 Minutes, Appetizers & Hors D’Oeuvres, Easy, Eat, For a Crowd, Recipes, Vegetarian